|
Perfect Apple Pie
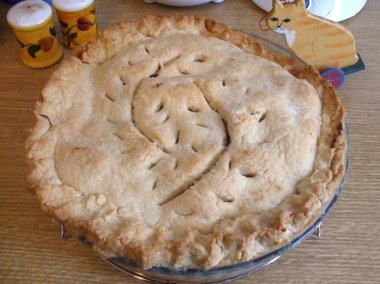
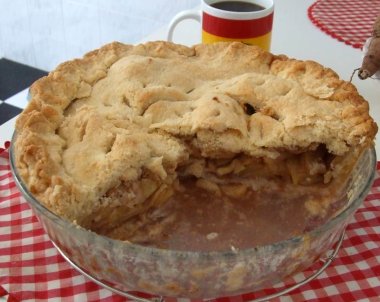
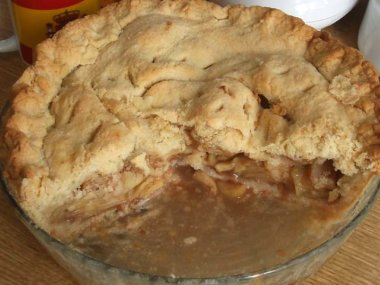
Perfect Apple Pie No matter what part of the world you hail from or live in, Apple Pie is a great dessert. You can buy apples and acquire flour from any part of the developed world. Herewith, are instructions to make the best, most delectable apple pie on earth. Apple Pie FillingIngredients5 or 6 large hard apples Granny Smith apples are the most commonly used for an apple pie because of their tartness and their texture. They are a little too tart for eating and make perfect apples for a pie. 1 cup sugar 1 teaspoon cinnamon 2 tablespoons flour DirectionsStart with a large bowl. Using a peeler, remove the skin from your apples. After all your apples are done getting peeled, then cut all your apples into quarters, cut out the seeds and pit. After they are all quartered and the seeds are cut out, then slice them thin, about ⅛ to ¼ inch wide slices. You don’t want them too wide, because they have to bake, absorb the sugar and be soft enough to eat when the pie is done. Keep your slices nice and thin, but not too thin because you don’t want them too mushy either. Next, cover them with sugar and cinnamon and flour. Use a large spoon and incorporate these ingredients into your apple slices well. You are adding flour so that as the pie bakes, it makes a nice apple syrup, your juice will not be runny, and will be cooked enough not to make your bottom crust soggy. Set your bowl of apples aside while you prepare your crust.
CrustIngredients2 cups flour 1 teaspoon salt ⅔ cup lard (Manteca de Cerdo), room temperature (mandatory) 6 tablespoons water Make the crust recipe twice – once for the bottom crust and once for the top crust. Making crust has been thought of through the ages as a difficult task. Nothing could be further from the truth. Making a flaky crust is the goal, and I will give you directions to do exactly what you need to for a flaky and very delicious crust. The crust is one-half the great flavor of your perfect apple pie. DirectionsPut your flour and salt in a large bowl, make sure the salt in incorporated well into the flour. Next, put your ⅔ cup lard into the middle of the flour. Take two knives and cut up the lard into small pea-sized pieces, incorporating the lard into the flour. This is probably the most important step in making your crust. You must incorporate your fat (lard) well into the crust so that the finished baked crust is flaky. Be patient and keep using your knives to slice up the lard into little pieces until it’s all cut into the flour. Next, add some water, 1 tablespoon at a time. What you are doing here is making it all one lump of dough, the water serves to hold the loose flour together. On warmer days, when your lard is room temperature, the less water you will need to add. I have made crust on many summer days when I didn’t need to add any water at all. Add the water while lightly, with your hand, mixing the dough around until you catch all the dry pieces of flour into the dough mixture. You do not want to add more water than this recipe calls for. 6 tablespoons is sufficient to get your flour well moistened enough to make a good dough. Then, put a big pile of flour on a clean counter top, about 2 feet of working space, to roll out the dough. Put the dough in the middle of your flour, and put a generous amount, say ¼ cup, on top of the dough. You are going to roll this ball out until its approximately ¼” thick, so you don’t want it sticking to either the counter or your rolling pin. So be generous with the flour to manage the crust to roll out without sticking. As the crust gets thinner and there are areas or spots of the crust that begin to stick, put some flour on it and keep rolling it out. This is very simple. It is probably the simplest part of the process. Now that your crust is rolled out, fold it in half, loosely, just handle it, because what you are going to do is lift it up and put it in your pie pan. So, fold over your crust, then lift it up and place the whole thing in your pie pan. Unfold it and fit the dough into the pan and form your bottom crust. For now, let the raw edges of dough lay over the pan, until after you have finished putting in your apples and put on the top crust. Next make your top crust, doing the procedure again. I wipe off the flour from the bottom crust and begin with a new pile of it to roll out the top crust. After you have your top crust finished being rolled out, then put your entire bowl of apples, (and by now there will be a good amount of juice in the apples too) into the bottom crust. Just as you folded your bottom crust up to lift it and place it into your pie pan, now do the same thing- fold it and pick it up and put it on top of the apples. Next, use some kitchen scissors and cut the raw crusts about 1” from the edge of the pie pan. Then, take the raw crust edges and roll them toward the edge of the pie, to form a boarder of pie crust all around the diameter of the pan. Use your forefinger and middle finger, and your thumb, to pinch the crust all around, making a decorative boarder, and sealing the crust so that no juice escapes while cooking. Last, make a steam escape for your pie, so it bakes well. Normally you can make a design in the top crust with a knife, just so there is a slit or two for the steam to escape while baking. Bake for 1 hour at 350f or 175C. That is all there is to it. Once you taste it, you will know you have made the perfect apple pie! Serving SuggestionsNothing is as good with warm or even cooled apple pie than a serving of delicious vanilla ice cream.
Back to Mediterranean Diet Recipes from Perfect Apple Pie
|


